Create a modding workspace
Remeber we created that folder structure earlier on in the guide? This will help us create a really nice VS Code development environment with features like code completion/IntelliSense.
To set up a workspace, follow these steps:
-
In VS Code, select File > Open Folder…
-
Open your development “mods” folder, for example
\UnrealDev\Subnautica2Mods\mods. -
Go to File > Save Workspace As… and save the “.code-workspace” file to
\UnrealDev\Subnautica2Mods\mods\mods.code-workspace -
Now, still in VS Code, in the root of the workspace create a file called
.luarc.json -
Open this file and paste in this text:
{ "$schema": "https://raw.githubusercontent.com/sumneko/vscode-lua/master/setting/schema.json", "workspace.maxPreload": 50000, "workspace.preloadFileSize": 5000, "workspace.library": ["../shared", "Scripts"] } -
What this does is tells the LUA extension to look in the
sharedfolder for the “types” files that we dumped earlier from UE4SS. There are a large number of these files, so we also tell VS code to expect lots of files and to process all of them. -
To refresh everything with the new settings, go to File > Close Workspace, then File > Open Workspace From File, and reopen the workspace file you saved.
Test your setup
At this point, we can create a little mod just to make sure everything is working as it should:
-
In VS code, create a folder in the
modsfolder calledLuaModTest. -
Within that, create a file called
enabled.txt. Just leave this blank. -
Create a folder within
LuaModTestcalledscripts. -
Within that, create a file called
main.lua. -
Don’t worry what this all means - we’ll cover this all later on in the “your first mod” section.
-
In the
main.luafile, paste this code:local UEHelpers = require("UEHelpers") local MOD_NAME = "BeginnersGuideCheatMod" ---@type APlayerController local playerController = UEHelpers.GetPlayerController() print(string.format("[%s] Lua Mod Test Successfully Loaded!\n", MOD_NAME)) -
Now, if you hover your mouse over
playerController, you should see a little popup that describes the properties of theAPlayerControllerclass: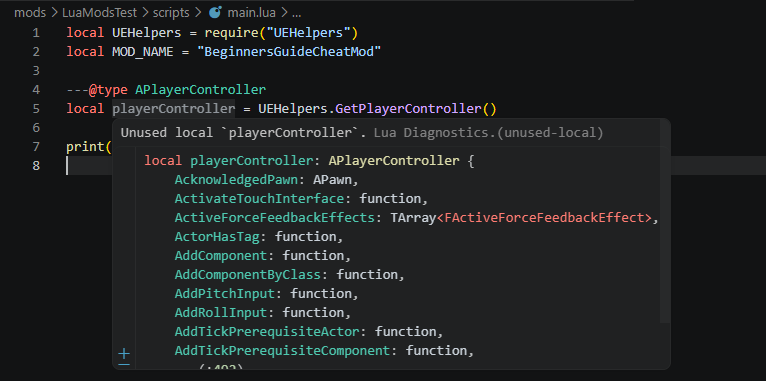
-
This shows the
sharedfolder is in the right place and the workspace is configured correctly. -
If you don’t see this popup, go back and check that:
- You’ve dumped the game LUA types.
- You’ve copied the resulting
sharedfolder into your development foldermodsfolder. - You’ve created the
.luarc.jsonin themodsfolder and added the content as shown above. - You’ve reloaded the workspace. Close and re-open VS Code, just to be sure.
-
Now launch the game.
-
Open the UE4SS window and have a look in the console tab. You should see this somewhere near the bottom:
[11:31:23.4858223] Starting mods (from enabled.txt (E:\Dev\UnrealDev\Subnautica2Mods\mods), no defined load order)... [11:31:23.4867904] Mod 'LuaModsTest' has enabled.txt, starting mod. [11:31:23.4938163] [Lua] [LuaTestMod] Lua Mod Test Successfully Loaded! -
If not, check:
- That you’ve modified the
UE4SS-settings.inifile correctly, adding your\UnrealDev\Subnautica2Mods\modsfolder. - You’ve created the test mod in the right place,
\UnrealDev\Subnautica2Mods\mods - You’ve created the
enabled.txtfile in the specific folder that you created for the mod,\UnrealDev\Subnautica2Mods\mods\LuaModTest
- That you’ve modified the
VS Code is now all set up and ready to go!