Creating a Visual Studio C# project
Hop into Visual Studio and create a new project. You must use the “Class Library (.NET Framework)” template for this:
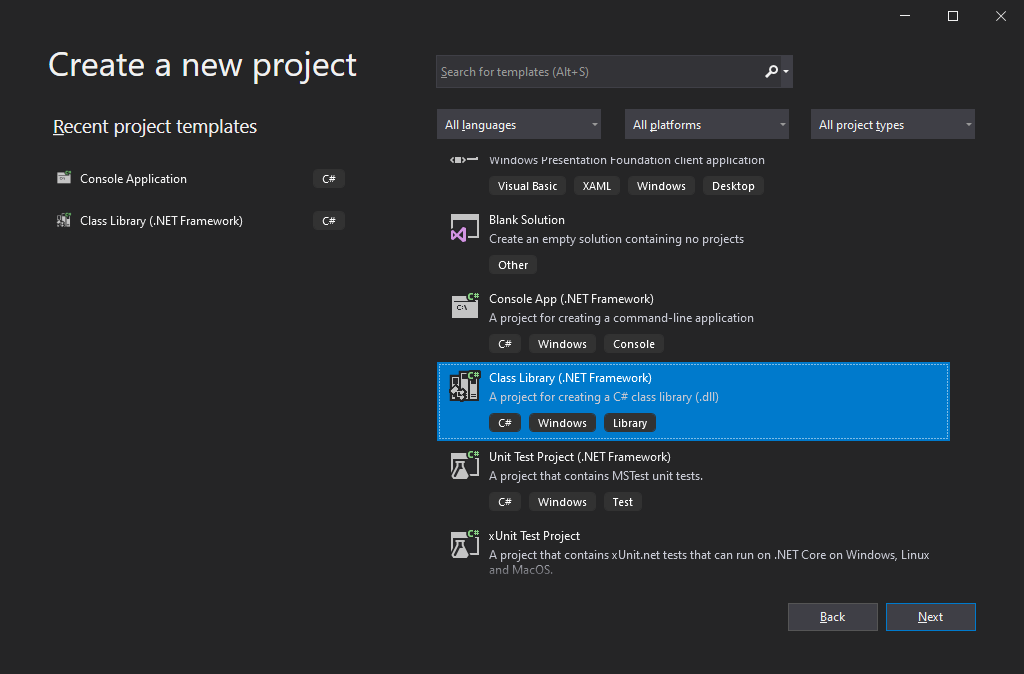
Note that the “Class Library” template is not the one you want as it targets .NET Standard or .NET Core. You specifically want to select the template for .NET Framework.
Let’s call the project KnifeDamageMod, set a location and select .NET Framework 4.7.2. Click the Create button, and you’re done! Who said this was difficult, right?!

Just to reiterate: you must select .NET Framework 4.7.2. If you don’t see it, go back to the Visual Studio installer and select it. Alternatively, you can download it manually from Microsoft.com
Okay, there’s more to it than that before we start.
Within Visual Studio, there are concepts of solutions and projects. The solution is like a container, and can contain many projects. The project contains code, configuration and files related to a specific assembly - in our case, our mod DLL. I like to use a single solution to keep all my mods together, you can do the same or otherwise. Like most things in coding, it’s really down to personal preference.
In the Solution Explorer window, right click the Solution and change the name to something like My Subnautica Mods. In the example below, I’ve called it “BeginnersGuideMod”, but you won’t want yours called the same. Having a single solution will allow us to create multiple mod projects within the same solution, allow code reuse and have a single Git repository keeping everything together.
You should have something like this:
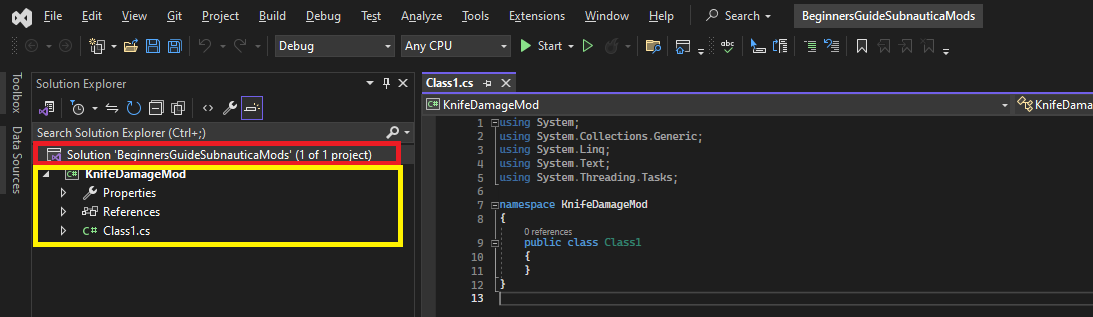
So, what you have now are
-
A
solution- shown in red above. -
A
project- show in yellow above.
Try and remember these terms as we go through the tutorial.
Pro Tip - using the Subnautica community templates
Just like the “Class Library” template gave you some “boiler plate” code and structure to start your mod, there are some community managed templates created specifically for building Subnautica plugins. These templates not only give you a nice, solid code base on which to begin modding, they also handle some of the tricky work around adding the right references and DLLs into your project.
You’ll have to run a PowerShell script in order to get hold of these templates, but once done won’t have to do it again. Just follow these steps to install the templates:
-
Go to the start menu and start typing PowerShell. Click the “Windows PowerShell” icon.

-
Run the following command:
dotnet new install Subnautica.Templates::1.0.0 -
The templates should now be installed:

-
When you next start a new mod project, you can select one of the new templates which should be listed under “Recent project templates”:

-
If you ever want to uninstall the templates, simply run this PowerShell command:
dotnet new uninstall Subnautica.Templates