Adding References
When we’re creating mods, we are typically using the functions and features of the game and the underlying game engine, to make the game do the things we want. To get access to these functions and features, and to those of our supporting tools such as Nautilus, we have to tell Visual Studio where to find the details of these methods and capabilities. This is where References come in. You can learn more about references over on Microsoft’s learning pages.
So, we need to add references into our new project, so that we can reference our tools and Subnautica files.
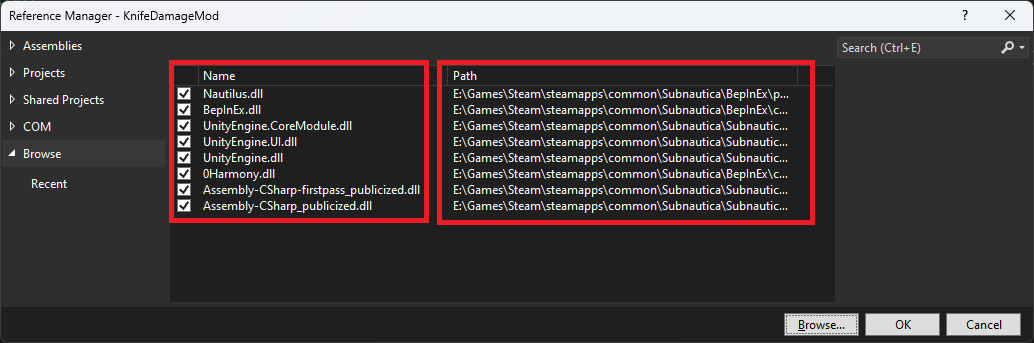
Right click References and select Add Reference. Click Browse and locate and add the following files:
| Filename | Default / Sample Location |
|---|---|
| UnityEngine.dll | <game>\Subnautica_Data\Managed |
| UnityEngine.CoreModule.dll | <game>\Subnautica_Data\Managed |
| UnityEngine.UI.dll | <game>\Subnautica_Data\Managed |
| Nautilus.dll | <game>\BepInEx\plugins\Nautilus |
| BepInEx.dll | <game>\BepInEx\core |
| 0Harmony.dll | <game>\BepInEx\core |
If you’ve run Publicizer, as recommended, you should add these references:
| Filename | Default / Sample Location |
|---|---|
| Assembly-CSharp_publicized.dll | <game>\Subnautica_Data\Managed\publicized_assemblies |
| Assembly-CSharp-firstpass_publicized.dll | <game>\Subnautica_Data\Managed\publicized_assemblies |
If you’ve not run Publicizer, add these:
| Filename | Default / Sample Location |
|---|---|
| Assembly-CSharp.dll | game>\Subnautica_Data\Managed |
| Assembly-CSharp-firstpass.dll | game>\Subnautica_Data\Managed |
You should see something like this:
If you are using Nautilus, it’s important to tell the modding framework that your mod will be referencing it. You do this by adding an attribute in your plugin code:
[BepInPlugin(GUID, MODNAME, VERSION)]
[BepInDependency("com.snmodding.nautilus")] // marks Nautilus as a dependency for this mod
public class MyPlugin : BaseUnityPlugin
We’ll cover this when we create the example mod.
With regards to references: you’re not going to need all of these, all of the time. You might not need any of them, you might need to add new references if you decide to use a different set of modding tools and libraries, or need to use other features of the Unity game engine.
Things change all the time, and there are often many ways to “skin a cat” in the coding world. These references give me what I need to make my simple mods.
Pro Tip - using the Subnautica community templates
Just a reminder here, that if you following the earlier steps to install the Subnautica community template packages, you won’t have to mess around with references. Everything will be handled nicely for you by the templates.