Visual Studio
Some complex mods require a Windows build environment, and the easiest way to set that up is to install Visual Studio Community Edition. Again, you don’t need this if you’re developing simple LUA mods, and I recommend only installing Visual Studio when you really need it.
To install, follow these steps:
- Download the Visual Studio Community Edition installer and run it.
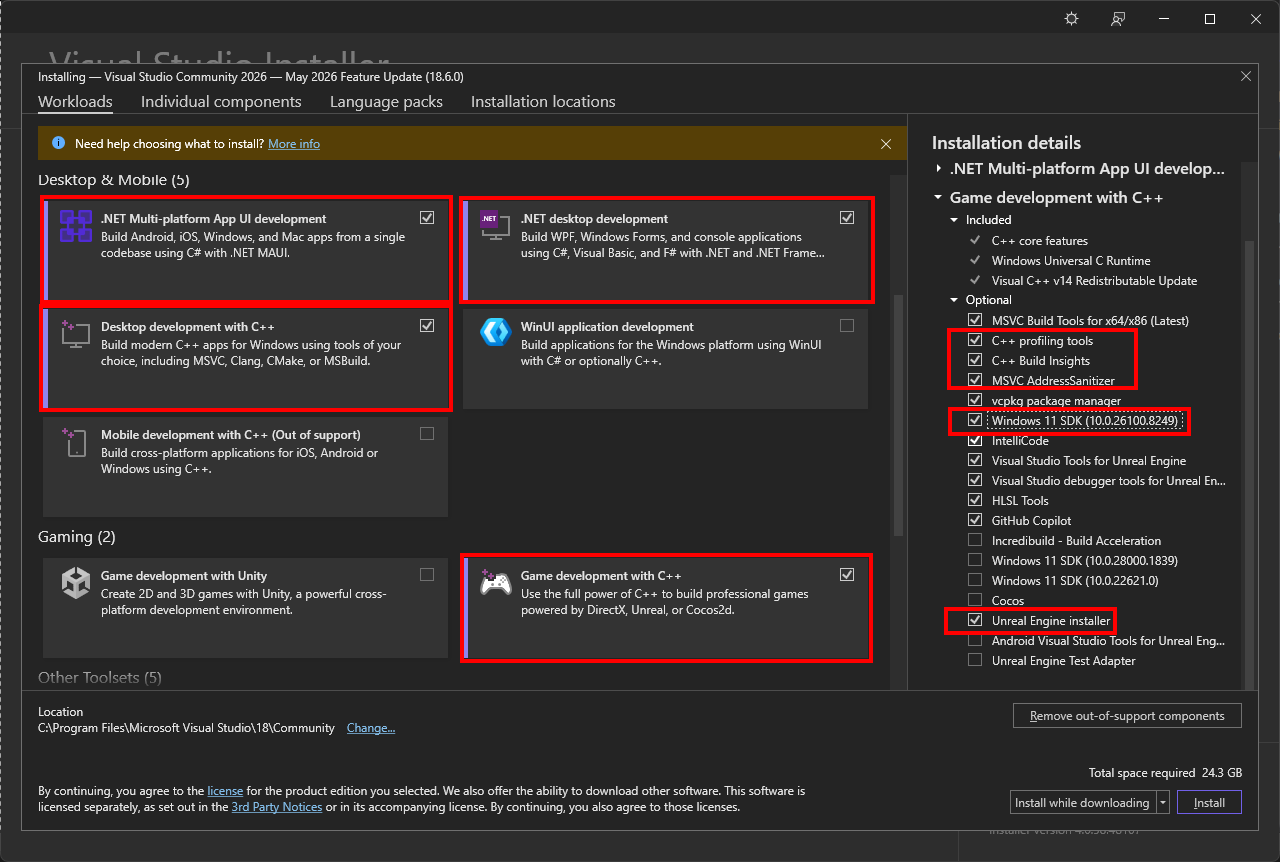
- In the workloads tab, under Desktop & Mobile, enable the following :
- NET desktop development
- Desktop development with C++
- .NET Multi-platform App UI development
- Under Gaming, enable Game development with C++.
- In the installer’s Installation Details panel, expand Game development with C++ and enable the following options:
- C++ profiling tools
- C++ AddressSanitizer
- Windows 10 or 11 SDK (10.0.18362 or Newer)
- Unreal Engine installer
- Click “Individual components”.
- Find and tick “MSVC v143 - VS 2022 C++ x64/x86 build tools (v14.38 - 17.8)(Out of support)”:
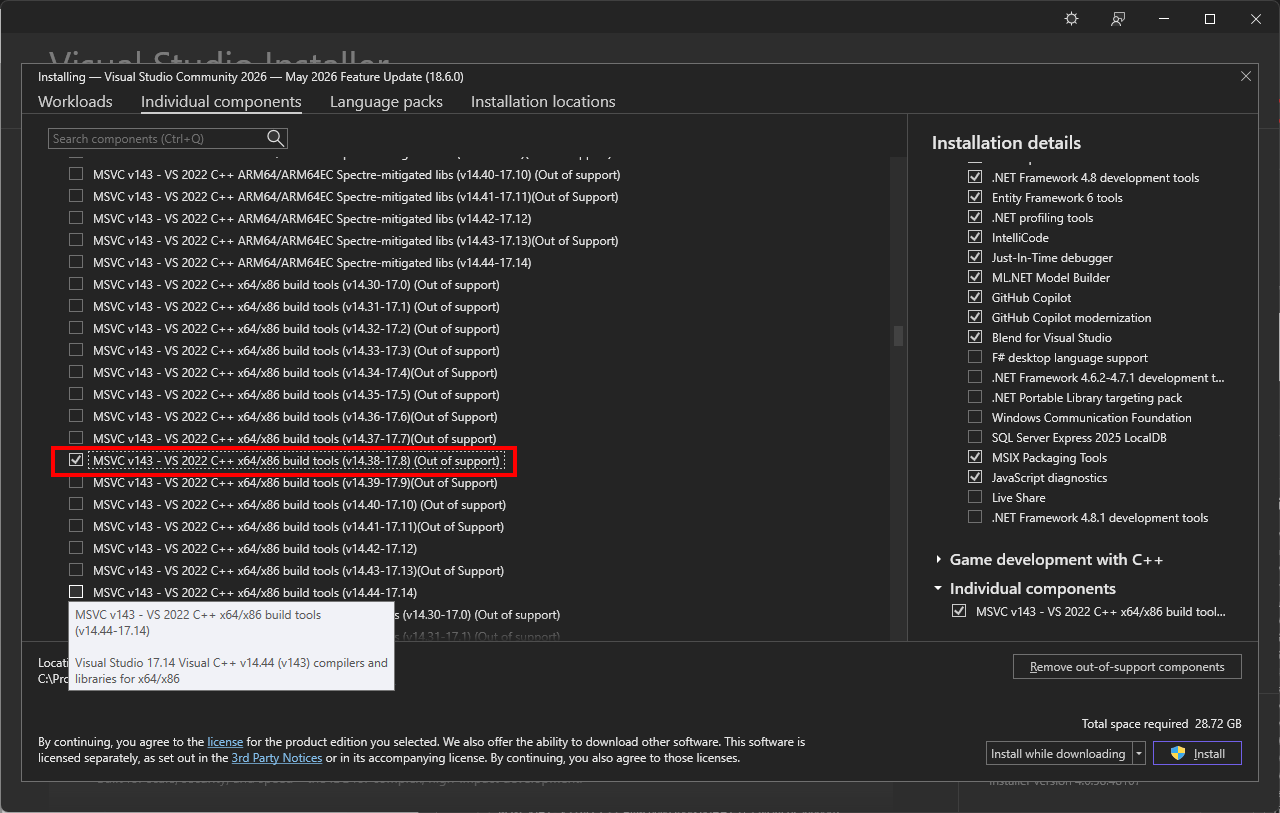
- Click Install
Visual Studio fits into the broader tool chain when creating more complex mods in Unreal Engine, which we’ll cover in detail in the “Advanced Modding” section of the guide.