Installation and Set-up
When I set up a Dev environment, I like to keep everything together. I have a dedicated 1TB SSD on my machine that I have mounted as E: and I put everything development related into E:\Dev\UnrealDev. I create subfolders in there for FModel and UAssetGUI, which keeps everything neat and tidy. You can do whatever you want, go with defaults, or put stuff where it’s accessible for you.
Remember, you don’t need to install everything, only the tools you need for the mod you’re creating. For the purpose of the simple tutorial, you only need:
- UE4SS
- FModel
- Visual Studio Code with the LUA extension
You don’t need to install the full Unreal Engine to get started.
UE4SS
You want to download and install the “DEV” version of UE4SS from Nexus mods:
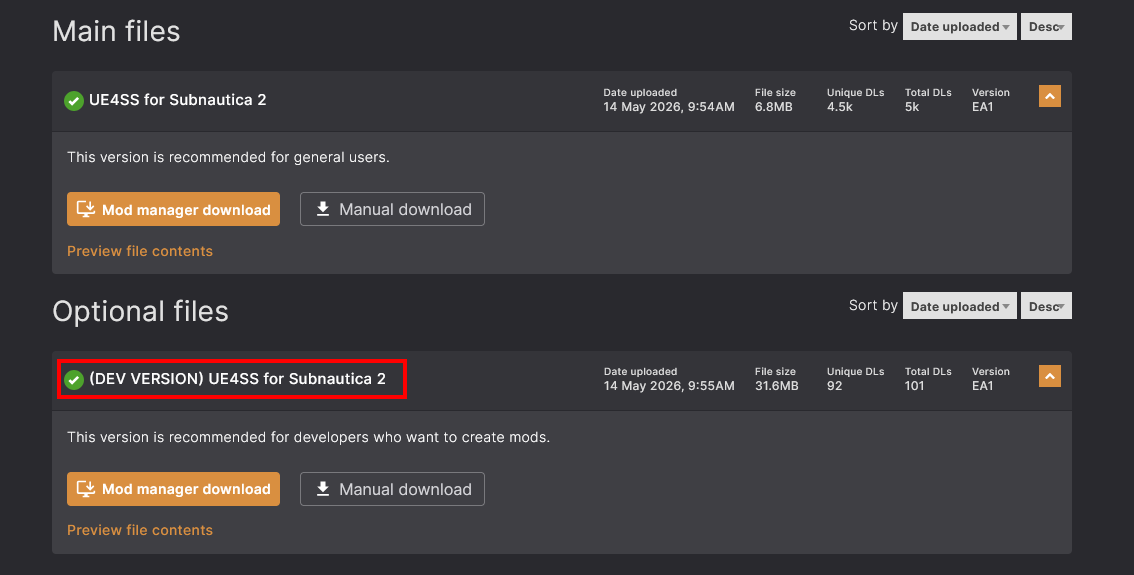
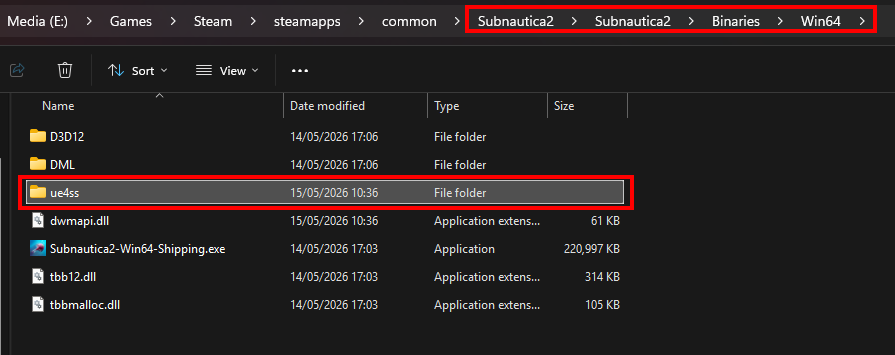
I prefer the “Manual download” method: simply download the mod ZIP file and extract the contents to \Subnautica2\Subnautica2\Binaries\Win64. Make sure you unzip the contents straight into this folder. Don’t copy/leave the ZIP file there and don’t copy in the wrapper folder from the mod download. Your Subnautica 2 installation folder should look like this:
FModel
Having downloaded the FModel ZIP file, there are a few steps need to get it working.
Generate a USMAP file
First up, we need something from UE4SS, that will allow you to decode the assets in the game to JSON structures for you to view:
- With UE4SS installed, launch the game.
-
You should see a UE4SS window:
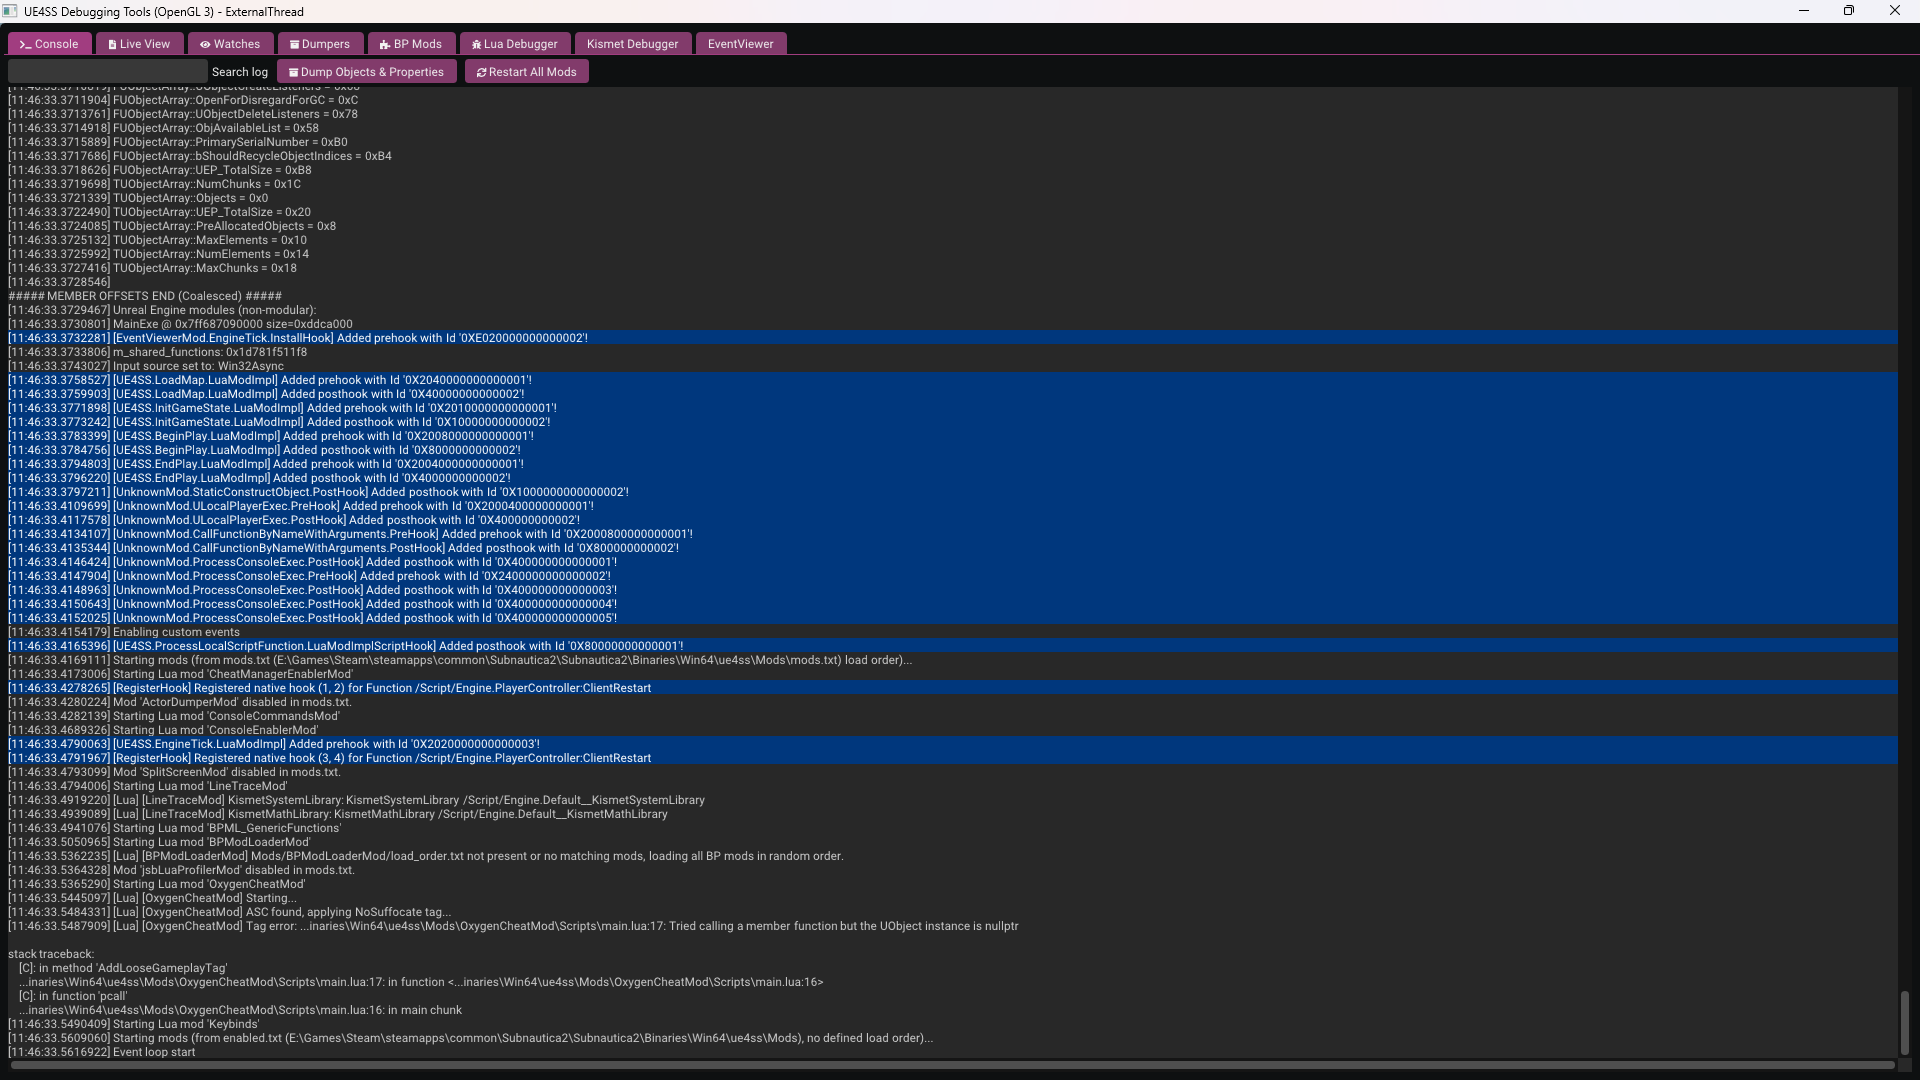
- Click the “Dumpers” button at the top.
- Click the “Generate .usmap file - UnrealMappingsDumper by OutTheShade” button.
-
This will create a file in the UE4SS folder:
Subnautica2\Subnautica2\Binaries\Win64\ue4ss\Subnautica2-x.y.z-nnnnn.usmap. The x, y, z, and n, represent different values depending on the version and build of the game. - You can now quit the game.
Configure FModel
Now to set up FModel:
- Unzip the file and copy
FModel.exeto your Dev folder. I put it in E:\Dev\UnrealDev\FModel. - Run the exe file.
- If you are prompted to “Download or update .NET”, click “Download it now”.
- This will download an executable to your default downloads folder, called something like
windowsdesktop-runtime-8.0.27-win-x64.exe. - Run this and click “Install” and close the installer once it’s done.
- Close the FModel window and launch the EXE again and you should see a “Directory Selector” window appear.
- Assuming FModel doesn’t yet know about Subnautica 2, under “Add undetected game”, click the 2 arrows to expand the window.
- Enter the name, “Subnautica2”
- Click the “…” button on the right of Directory and select your Subnautica 2 installation folder:
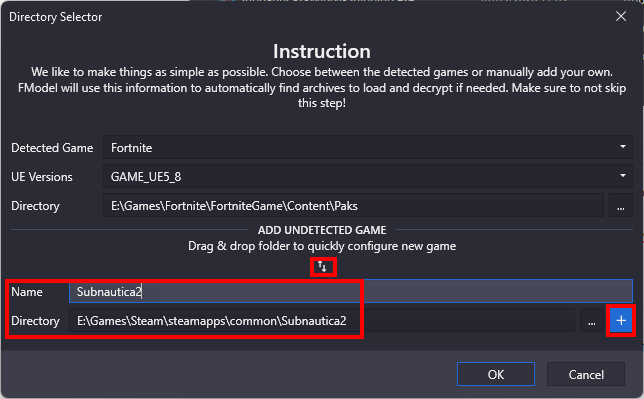
- Click the “+” button to add the new game.
- FModel should detect the Unreal Engine version, in this case “GAME_UE5_6” :
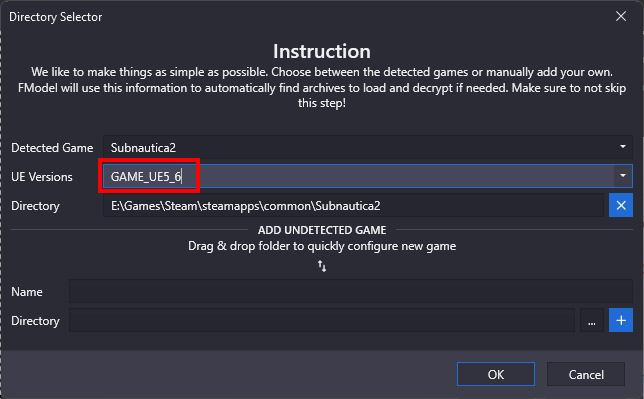
- Now click “OK”.
- You should see a list of Subnautica 2 files under Game Archives, all being well.
- Click the Settings menu item and enable “Local Mapping File (drag & drop)”.
- You can either drag and drop the “.usmap” file created earlier, or click the three dots button and locate it. Remember, it was created by UE4SS as
Subnautica2\Subnautica2\Binaries\Win64\ue4ss\Subnautica2-x.y.z-nnnnn.usmap. - Click OK.
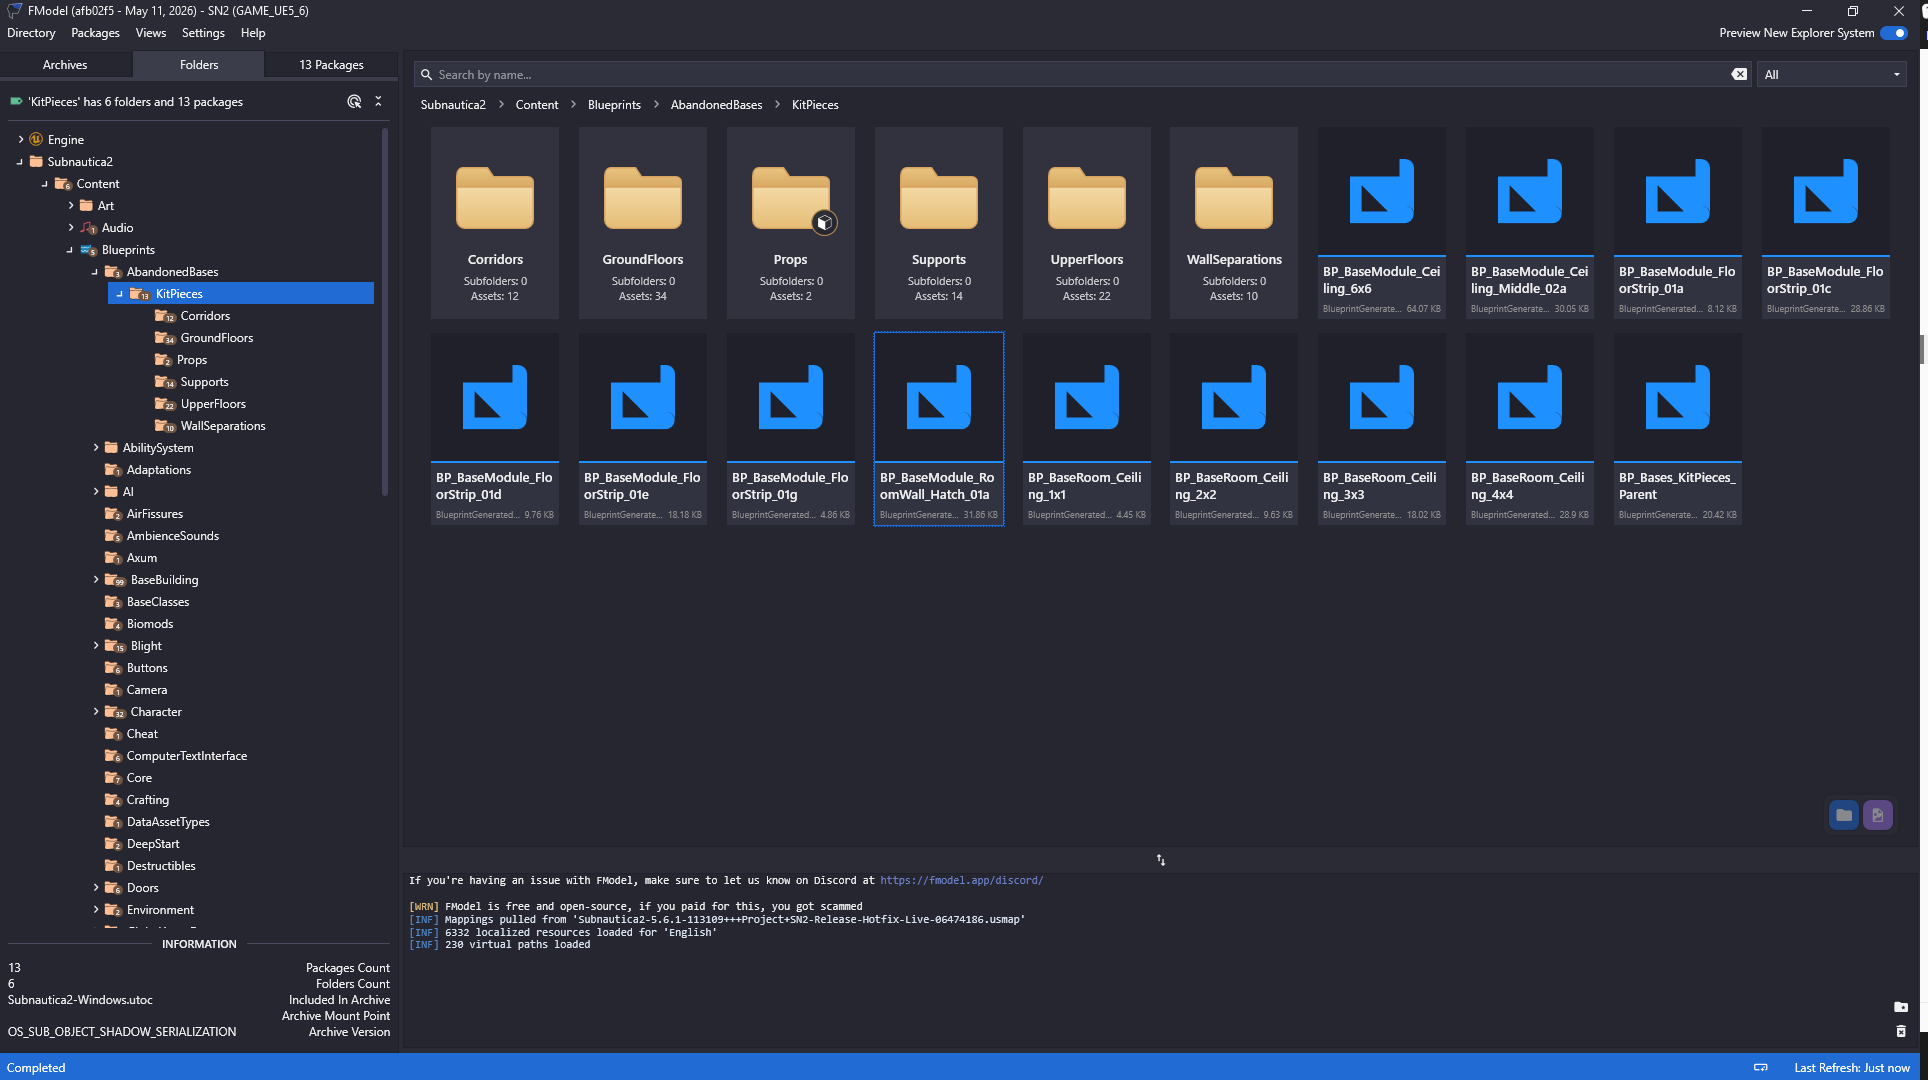
- You can test everything is working by double clicking “Subnautica2-Windows.utoc”, then expanding “Subnautica2 > Content > Blueprints” until you see some assets. Doubling clicking a Blueprint asset should display a JSON file describing the asset contents:
UAssetGUI
Just download the UAssetGUI.exefile from the latest release on Github, and copy it to your Dev folder. I put it in E:\Dev\UnrealDev/UAssetGUI.
Visual Studio Code
You can set up Visual Studio Code as a nice little IDE for editing your LUA mod code.
Generate game LUA types
We can again leverage UE4SS to improve things even further by dumping LUA bindings for use in VS code:
- Having installed UE4SS, launch the game.
- Click the “Dumpers” button at the top of the screen.
- Click the “Generate Lua Types” button.
- This will generate a load of files in
\Subnautica2\Subnautica2\Binaries\Win64\ue4ss\Mods\shared\types.
Install VS code
- Download the Visual Studio code installer and run it.
- Launch Visual Studio Code and click “Open Folder”.
- Open your UE4SS “mods” folder,
\Subnautica2\Subnautica2\Binaries\Win64\ue4ss\Mods. - Go to File > Save Workspace As… and save the “.code-workspace” file to
\Subnautica2\Subnautica2\Binaries\Win64\ue4ss\Mods - Go to File > Preferences > Extensions
- Search for “LUA” and find the extension by “sumneko”.
- Click “Install” next to that extension.
- Click “Trust publisher and install”.
- In the root of the workspace create a file called
.luarc.json - Open this file and paste in this text:
{
    "$schema": "https://raw.githubusercontent.com/sumneko/vscode-lua/master/setting/schema.json",
    "workspace.maxPreload": 50000,
    "workspace.preloadFileSize": 5000,
    "workspace.library": ["../shared", "Scripts"]
}
- Go to File > Close Workspace, then File > Open Workspace From File, and reopen the workspace file you saved.
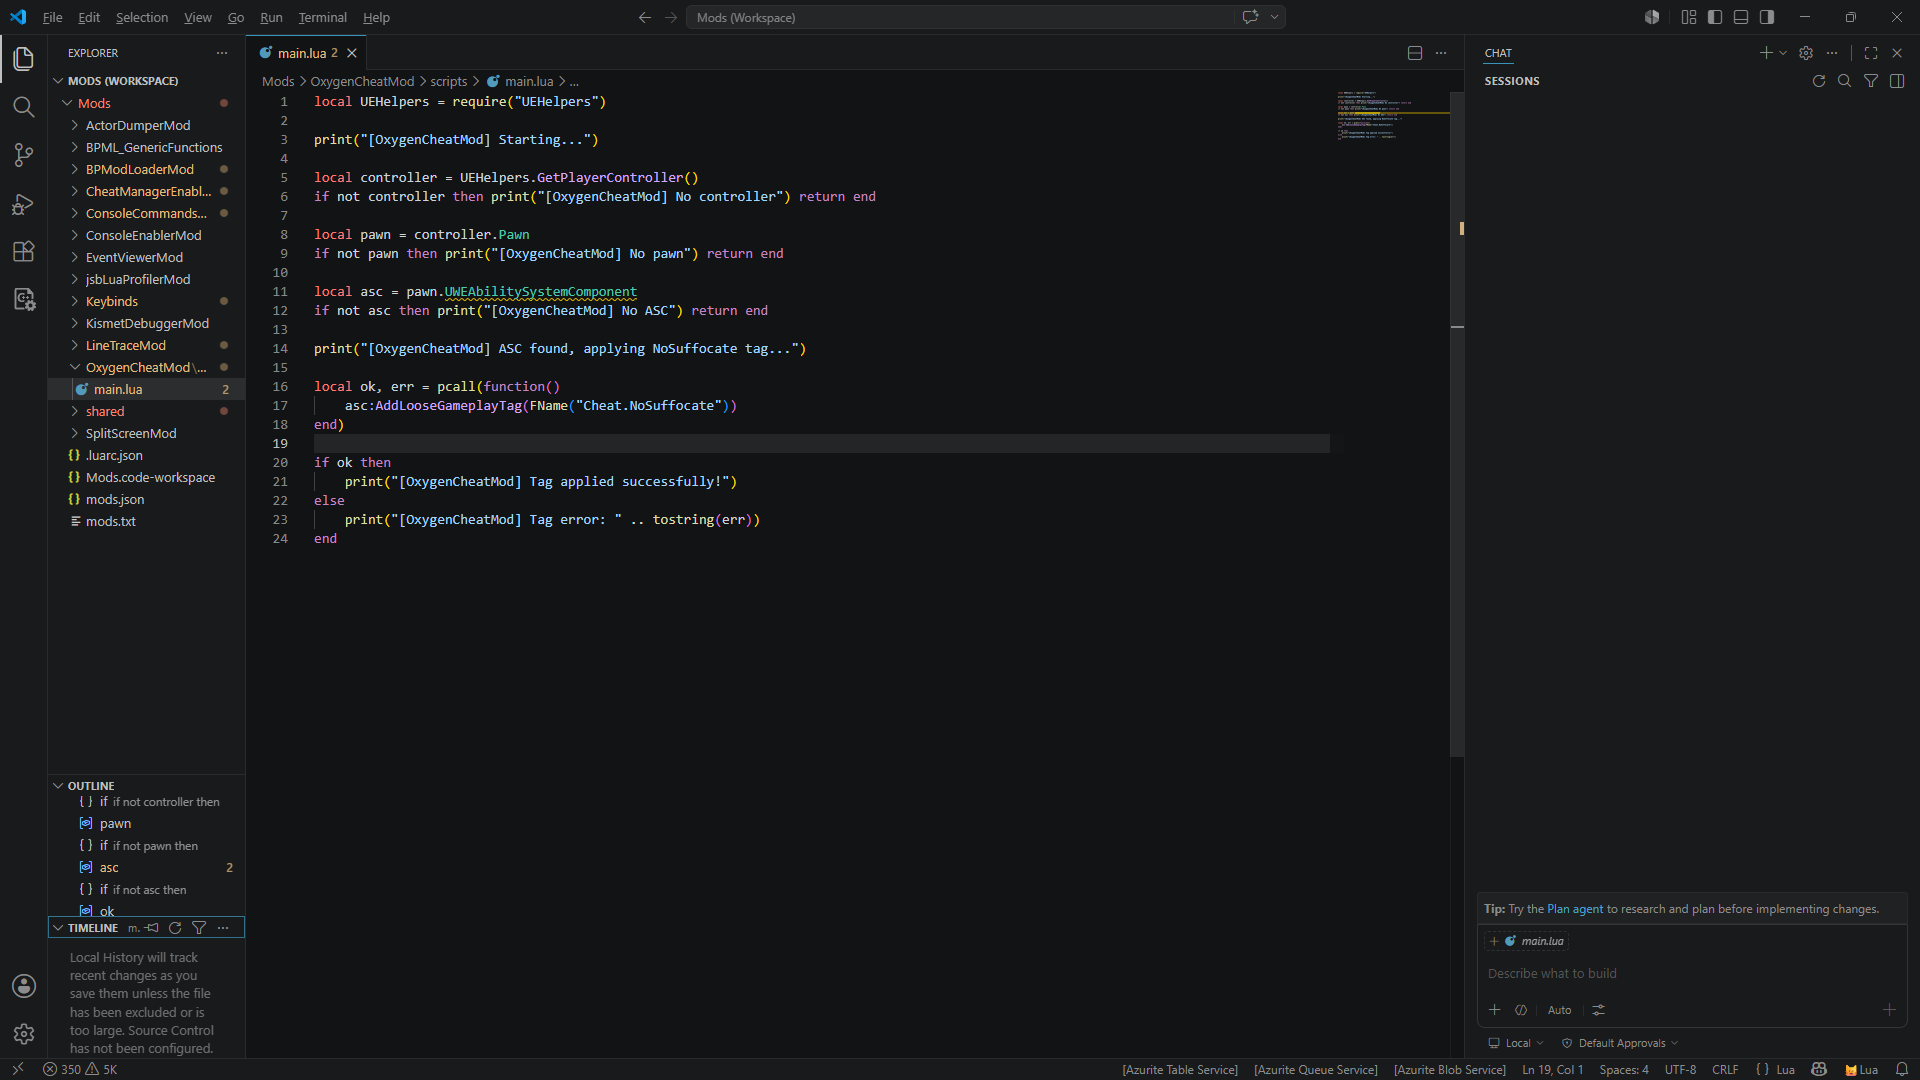
- You’ll have a really useful, lightweight IDE environment in which to develop your code:
retoc
This is another easy one. Just download the latest version from Github and unzip to your Dev folder. For example, I downloaded retoc_cli-x86_64-pc-windows-msvc.zip and unzipped it into E:\Dev\UnrealDev\retoc.
Unreal Engine
Installing Unreal 5 set up is relatively easy:
- Download and install the Epic Games Launcher and run it.
- Run the Launcher.
- Click “Unreal Engine” on the left, and click the “Library” tab.
- Click the “+” button next to “Unreal versions”, then click the little drop down to select the version you want to install:
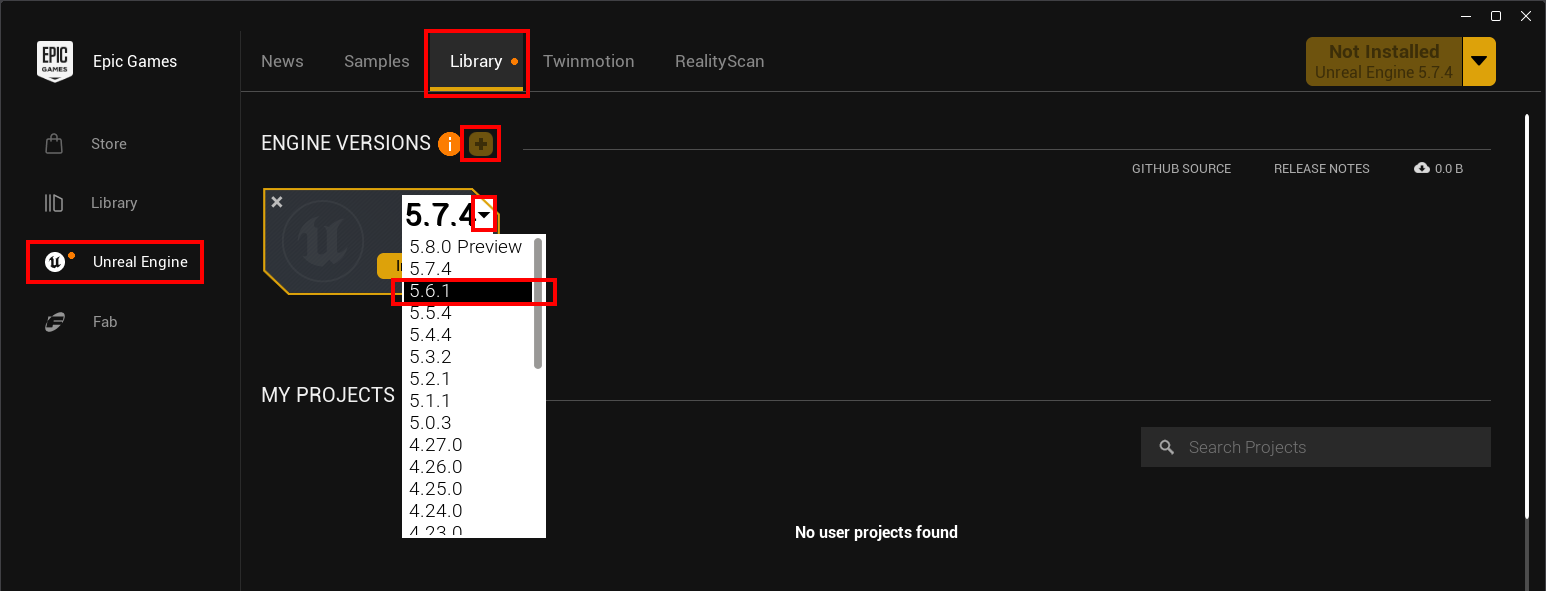
- Once you’ve selected the version, click the “Install” button.
- Cand select a target folder and click Install. I like to keep everything together, but you can install it anywhere:

Installing Visual Studio/Windows SDK
Some complex mods require a Windows build environment, and the easiest way to set that up is to install Visual Studio Community Edition.
- Download the Visual Studio Community Edition installer and run it.
- In the workloads tab, under Desktop & Mobile, enable the following :
- NET desktop development
- Desktop development with C++
- .NET Multi-platform App UI development
- Under Gaming, enable Game development with C++.
- In the installer’s Installation Details panel, expand Game development with C++ and enable the following options:
- C++ profiling tools
- C++ AddressSanitizer
- Windows 10 or 11 SDK (10.0.18362 or Newer)
- Unreal Engine installer

- Click Install
GitHub Desktop
Again, totally optional. I just find the desktop tool gives me a warm fuzzy feeling that my code is safe, and nothing is ever lost! Download and install using the installer, following the prompts. Simples!
Vortex
Install Vortex if you want to manage Subnautica 2 mods, but also if you want to package your own mods for distribution via Vortex and Nexus mods. This will allow you to test your own mod packages when you publish them.
Follow these simple steps to install and configure Vortex:
- Download Vortex from Nexus mods and simply run the installer.
- Once installed, run Vortex.
- Click the “Games” item under “General” in the top left and search for “Subnautica”.
- Find “Subnautica 2” and click the “Manage” button.
- Click “Download” to download the Subnautica 2 extension.
- Vortex will restart.
- When prompted, point Vortex to your Subnautica 2 game folder and select the appropriate platform.
- You’ll now be able to download and manage Subnautica 2 mods, including the ones you build and upload.